Difference between revisions of "Aspex PSEM"
(Tag: Visual edit) |
(→XY stage) (Tag: Visual edit) |
||
| (One intermediate revision by the same user not shown) | |||
| Line 7: | Line 7: | ||
A survey indicated the following models exist: | A survey indicated the following models exist: | ||
| − | * PSEM 75 | + | *PSEM 75 |
| − | * PSEM II | + | *PSEM II |
| − | * PSEM 2000 | + | *PSEM 2000 |
| − | * ASPEX 3020 | + | *ASPEX 3020 |
| − | * ASPEX 3025 | + | *ASPEX 3025 |
| − | * JEMM | + | *JEMM |
=Operation= | =Operation= | ||
| Line 176: | Line 176: | ||
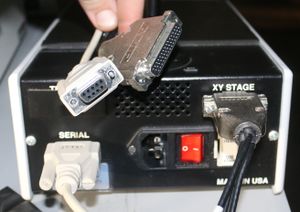
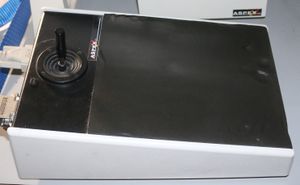
=XY stage= | =XY stage= | ||
| + | [[Aspex PSEM XY Stage]] | ||
| + | |||
[[File:mcmaster_aspex_psem_xy_cont_back.jpg|300 px]] | [[File:mcmaster_aspex_psem_xy_cont_back.jpg|300 px]] | ||
Latest revision as of 05:36, 8 November 2020
A survey indicated the following models exist:
- PSEM 75
- PSEM II
- PSEM 2000
- ASPEX 3020
- ASPEX 3025
- JEMM
Contents
Operation
2018-04-24 notes
- Summary: generally seems to work, reliability issues possibly software related
- Booting
- Embedded controller ethernet must have system (ie my laptop) at other end at boot
- Embedded controller stage connection must be attached at boot
- Cannot be activated without restarting system
- GUI will complain and then segfault, but otherwise seems operational
- GUI
- Sometimes signal disappears and can be made to come back by switching signal views around (ie left pane vs right pane)
- Sometimes GUI becomes completely unresponsive and has to be rebooted. But seems to only happen when changing settings, ie not during imaging cycles
- Pressure
- Around 2E-5 typical pressure after pumping down
- BSE not working
- Wiggling power cable RJ-11 causes noise on screen
- Removing signal BNC results in blank screen
- Next
- Check power supply
- Scope on BNC
- EDS still not tested
- Adjusting XY centering helped bring up beam energy
- Current was something like 25 uA...think target is 75 uA => probably need to adjust something
- Was able to select different acceleration voltages
- Focusing
- Set image to 256x256
- Set scan speed relatively high
- Adjust slider until in focus
- Increase resolution if need to get finer focus
- Didn't try using auto-focus this time
- Degaussing may bring out of focus
- Changing accelerating voltage brought out of focus slightly maybe
- Higher acceleration voltages are fuzzier (makes sense => deeper penetration => more scattering)
Open questions / TODO:
- Manual describes filament volts, but GUI shows %. What is the mapping?
- Why can't I get an image in suggested filament range? Needs replacement?
- Note: replacements on order
- Replace filament?
- IIRC over 200 hours logged in GUI
- "filaments, which typically last between 50 and 250 hours"
- Do I need to replace column liner? Can I get them?
- BSE detectors works?
- EDS works?
- What does bias actually do? Bias on Whenelt to extract electrons?
- Why didn't newer software work? Retry it
- Source imaging mode?
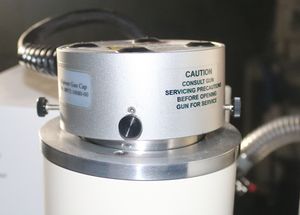
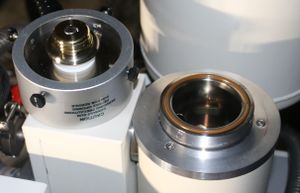
- Gun assembly is slightly crooked (seal?). Replace seal? What caused this?
- Dump engine HDD
- Without removing it?
Notes primarily from McMaster unit. Might add some info from mne
- "FL DEPT OF LAW ENFORCEMENT"
20 kV
RJ Lee => Aspex => FEI
- Quickstart manual 4.0 Oct 1997: RJ Lee Instruments Ltd.
- "I just called RJLee, and discovered he has sold the business and there are no more new PSEM's being sold."
- Maybe during a short while? Aspex continued sales
- "R J Lee's SEM group was spun off as Aspex in 1995"
"By default, we use 10.133.67.1 for the engine and 10.133.67.2 for the console...The IP address of the engine is configured in the file C:\PSEM\WATTCP.CFG"
- "These addresses conform to the communications protocol standard RFC-1918 for non-routed IP addresses"
- No they don't...
Calibration: "Geller multi-resolution mag standard"
- geller magnification standard
- [2]
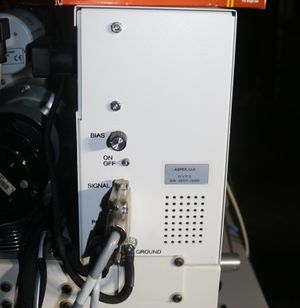
"On discrete high voltage power supplies, the bias is adjusted via a physical knob on the back of the power supply. On continuous high voltage power supplies, the bias is adjusted by a software knob accessed via the Advanced button on this panel."
"he engine will issue a couple higher-pitched beeps within the first 10-15 seconds, then after about a minute a single low-pitch (256 Hz) 1⁄2-second beep will indicate that the engine has started successfully"
Parts
| Image | Vendor | Model | Type | Notes |
|---|---|---|---|---|
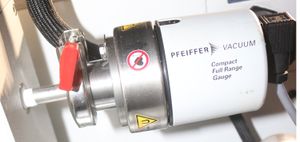 |
Pfeiffer | Gauge | 1.033279656 | |
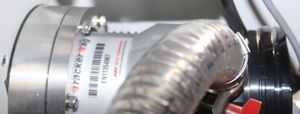 |
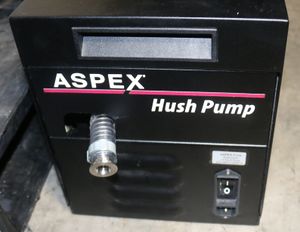
Edwards | EN11354967 | Pump, turbo | |
| Edwards | EXC100L, D39622000 | Pump, turbo controller | ||
| Pump, roughing | ||||
| EDS, sensor | ||||
Vacuum
Pfeiffer Vacuum, D-35614 Asslar
Typ: PKR 251 (2010/09)
No: PTR26000
F-No: 44369203
15...30VDC, 2W
"You will note that there is a n indicator light labeled "PUMP" on the front drawer of the computer drawer which will initially flash. This flashing indicates that the turbo pump is being accelerated to its maximum speed. The turbo should normally reach its maximum speed in 2-3 minutes and this light will then illuminate steadily. Once the pump light is a solid green, no longer flashing, the system is ready to use."
"Increase the filament knob until you see the value for EMISSION begin to rise. This will typically occur around DRIVE setting of 5-8 volts. At this time you will also see some indicates of an image on the image screen."
"Increase FILAMENT until somewhat past the point at which the image brightness no longer appears to increase."
"Under normal circumstances, the amount of stigmation correction should be rather modest (typically less than 0 mA correction current). If large correction values are required, it may be an indication that the column liner tube is contaminated and needs to be replaced"
"The electron source on the PERSONAL SEM users a unique emitter cartridge construction (US Patent 5,376,792) that incorporates a filament and control grid in a single low-cost, pre-cleaned and pre-aligned assembly."
Front
Back
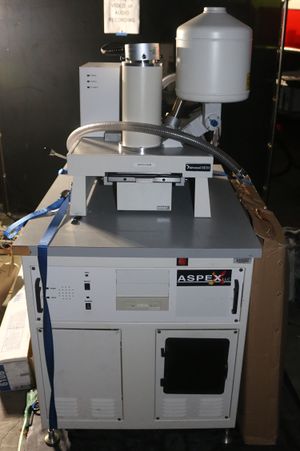
Aspex Instruments
P/N 40P 03954
S/N 03954:10004
PC
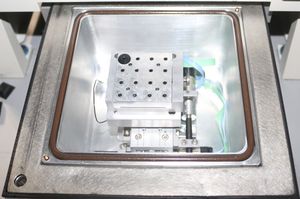
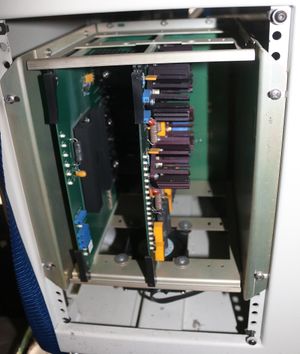
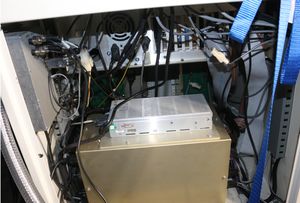
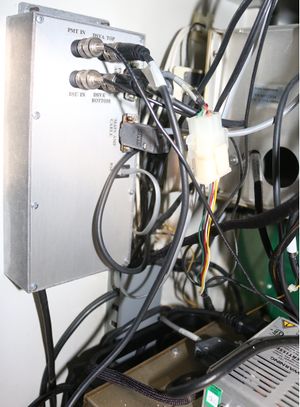
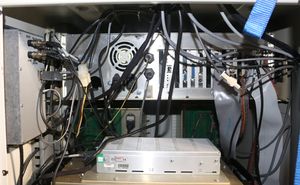
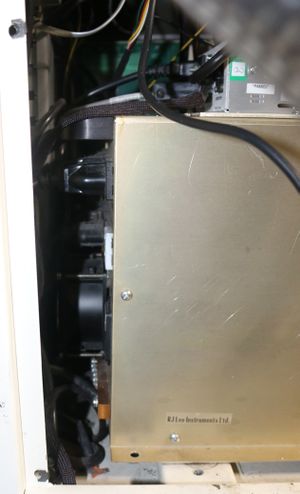
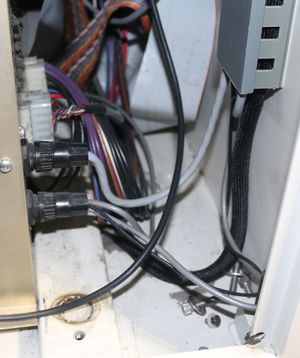
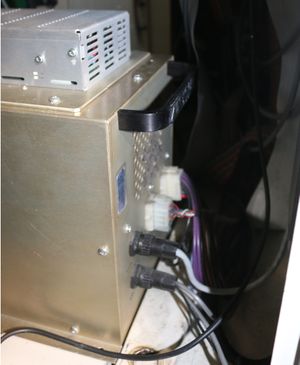
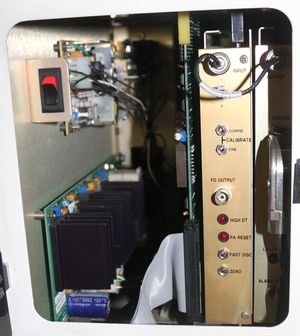
XY stage
Where does this go?
Filament
Cambridge 12 mm diameter, 1 mm pin diameter
(09:14:44 AM) mne: I think I ordered them from a german supplier, but they are easy to find in the US as well
(09:15:43 AM) mne: They are cambridge filaments
(09:16:12 AM) mne: Should be those: [3]
(09:16:56 AM) mne: 12mm disc diameter, 1mm pin diameter
| Vendor | Item # | Description | Price/pack | Qty/pack | Qty/each | Notes |
|---|---|---|---|---|---|---|
| Ted Pella | 1403 | |||||
| Electron Microscopy Sciences | ||||||
| Electron Microscopy Sciences | ||||||
| SPI Supplies | ||||||
| SPI Supplies | ||||||
| EB Sciences | ||||||
| EB Sciences | ||||||
| Fisher Scientific | ||||||
| Soquelec | ||||||
| Soquelec | ||||||
| ME Taylor |
Stud
Computer: engine
Starting MS-DOS...
HIMEM is testing extended memory...done.
MICROSOFT Expanded Memory Manager 386  Version 4.49
Copyright Microsoft Corporation 1986, 1994
EM386 successfully installed.
Expanded memory services unavailible.
Total upper memory availible  . . . . . .    82 KB
Largest Upper Memory Block availible  . .    59 KB
Upper memory starting address . . . . . .  C900 H
EM386 Active.
Lut1 is initialized
Lut2 is initialized
DB2 COFF Loader 2.00C - IBM-PC
[ Loading: c:\db3\writit.out ]
DB2 COFF Loader 2.00C - IBM-PC
[ Loading: c:\db3\wrto.out ]
DB2 COFF Loader 2.00C - IBM-PC
[ Loadering: c:db3\scanit.out ]
SysTest.exe - PSEM II/2000 hardware validation utility - Mar 15 2001
Copyright 1998-2000 Aspex LLC
'SysTest -?' for help.
Power Supplies
Nominal +15 V power supply = 14.0058 V
Nominal -15 V power supply = 13.107 V
Scan center found at (2049,2044)
DVSA offset (1022,1019)
Unable to find power line sync signal.
DXPInit.exe v. 1.00b - Copyright (C) 2000 Aspex LLC
3Com EtherLink PCI Bus Master Packet Driver v5.2.6
(C) Copyright 1999 3Com Corp.  All rights reserved.
Attempting to auto detect media.......
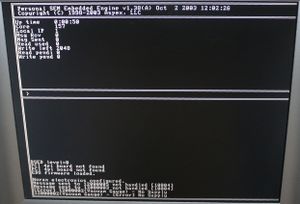
Initial boot:
Personal SEM Embedded Engine v1.38(A) Oct 2 2003 12:02:26
Copyright (C) 1998-2003 Aspex, LLC
Up time     0:00:00
Core        205
>
BSED level=0
PCI 4pi board not found
PCI 4pi board not found
EDS firmware loaded.
Noral electronics configured.
Message sent to 12000005 not handled [10004]
Message sent to 12000003 not handled [10004]
[Error] 12000002(Vacuum Gauge) - No Supply
12000002(Vacuum Gauge) - [Error] No Supply
The errors cleared on subsequent boots. Unclear if they cleared on their own or because I was messing with cables
Disk image
I have two disk images:
- My SEM, with EDS support
- A friends SEM, does not have EDS
Disk psem_hdd_eds.bin: 7 GiB, 7510164480 bytes, 14668290 sectors
Units: sectors of 1 * 512 = 512 bytes
Sector size (logical/physical): 512 bytes / 512 bytes
I/O size (minimum/optimal): 512 bytes / 512 bytes
Disklabel type: dos
Disk identifier: 0x00000000
Device            Boot    Start      End  Sectors    Size Id Type
psem_hdd_eds.bin1 *          63  4192964  4192902      2G  6 FAT16
psem_hdd_eds.bin2       4192965 14651279 10458315      5G  5 Extended
psem_hdd_eds.bin5       4193028  8385929  4192902      2G  6 FAT16
psem_hdd_eds.bin6       8385993 12578894  4192902      2G  6 FAT16
psem_hdd_eds.bin7      12578958 14651279  2072322 1011.9M  6 FAT16
For kicks I tried booting a disk image in QEMU. It got stuck right after "EM386 active"
mounting:
mkdir 1 5 6 7
sudo mount -o loop,,offset=$((512 * 63)) psem_hdd_eds.bin 1
sudo mount -o loop,ro,offset=$((512 * 4193028)) psem_hdd_eds.bin 5
sudo mount -o loop,ro,offset=$((512 * 8385993)) psem_hdd_eds.bin 6
sudo mount -o loop,ro,offset=$((512 * 12578958)) psem_hdd_eds.bin 7
Only 1 has real data on it:
/dev/loop0                   2.0G   18M  2.0G   1% /home/mcmaster/buffer/ic/sem_hdd/1
/dev/loop1                   2.0G     0  2.0G   0% /home/mcmaster/buffer/ic/sem_hdd/6
/dev/loop2                   2.0G     0  2.0G   0% /home/mcmaster/buffer/ic/sem_hdd/5
/dev/loop3                  1012M     0 1012M   0% /home/mcmaster/buffer/ic/sem_hdd/7
Poked around, various things of potential use.
DXPInit.exe v. 1.00b - Copyright (C) 2000 Aspex LLC
c:\psem\engine.ini
EDSDetector
Syntax: DXPInit [1|2|3|4] [d[isc]] [n[odisc]] [v[erbose]] [h[elp]]
where 1,2,3,4 is the COM port (default=3) and
'disc' forces a discriminator calibration.
'nodisc' forces no discriminator calibration.
Initializes and calibrates the Gresham digital pulse processor using
configuration data from 'c:\psem\engine.ini'.
ENGINE.INI file items:
DXPProcessTime=(int)1-7 for 1.6, 3.2, 6.4, 12.8, 25.6, 51.2, 102.4 us
DXPFineGain=(int)2000 sets the energy/channel scale
DXPDisc[0-3]=(double)0.0..5.0 - auto calibrated with 'disc' option
DXPZeroStrobe=(int)1 - for on - (int) 0 for off
EDSDetector=(int)3 - for a DXP pulse processor
ENGINE.INI:
DSVAAddr=(int)800
CBAddr=(int)768
DB3Addr=(int)53248
EDSMemAddr=(int)54272
EDSAddr=(int)704
DACAddr=(int)640
GainVal=(int)0
XOffCal=(int)1022
YOffCal=(int)1019
XCenterCal=(int)2049
YCenterCal=(int)2045
Range1=(float)9.86
Range2=(float)99.44
Range3=(float)994.95
LineDel[0]=(int)0
... (some larger calibration tables)
ShfCorr[7][3]=(int)4
HVSupplyType=(int)1
VacuumGauge=(int)1
EDSDetector=(int)1
BSEDOption=(int)2
VacuumOption=(int)0
Bias=(int)0
FilamentCycles=(int)64
FilamentTime=(int)5821
UseStageLimits=(int)0
XUpperLimit=(float)999.90002
XLowerLimit=(float)-999.90002
YUpperLimit=(float)999.90002
YLowerLimit=(float)-999.90002
OrthogonalCorrection=(int)4
CO_XMin=(float)0.017403
CO_Ko=(float)4.549e-07
MagConstant=(float)18429
LoggingEnable=(int)0
ImageRotA=(float)11000
ImageRotB=(float)180
Computer: GUI
Using a T61p w/ WinXP
"When the middle mouse button is depressed at the same time as either the right or left mouse buttons, the increase or decrease is accelerated. Alternatively, if you hold down the ALT key, and then press the right or left mouse button, the increase or decrease is accelerated"
"CTRL RIGHT CLICK on any knob to open a dialog box that enables the user to change knob properties."
"Sticky Buttons Enable this control through a context-sensitive menu using CTRL RIGHT CLICK while the mouse pointer is over either the focus or stigmator grid."
"The optimal filament current is located just after the ‘knee’ of the curve and is typically about 75 to 80% of maximum filament current."
"The range of settings for the Filament Drive is 0 to 100%, with a typical operational setting of about 75%."
"Emission current is a measure of the number of electrons emitted by the filament. It is not a measure of the number of electrons that strike the sample"
"Typical emission currents are between 20 and 100 μA with the optimal about 50 μA"
"The bias voltage is the potential between the wehnelt and filament that shapes the electric field near the filament and modifies the shape of the emitted beam."
"The procedure for optimizing the bias is described in Section 6 (Procedures) of this manual."
"filaments, which typically last between 50 and 250 hour"
"Some operators have observed that the emission current is usually less stable during the first and last few hours of filament life."
"For more information, refer to Gun Coil Alignment Procedure in Section 6 (Procedures) of this manual."
"vacuum pressure must be better than 2 × 10 -4 torr to enable the beam high voltage."
Reference GUI shows QuadBSED but IIRC mine is just BSED. Photo shows its a QuadBSED. Is this relevant or just a GUI wording update?
- Later section lists them as two separate detectors. SW misconfigured?
- pg 46 shows both tabs there
"AutoVideo tries to optimize the brightness and contrast so that the weakest signal corresponds to a near-black pixel, and the strongest signal corresponds to a near-white pixel"
"The Cage check enables and disables the voltage that accelerates electrons from the sample into the SE detector. The Scintillator check enables and disables a bias across the crystal that measures the secondary electrons."
"The Aspex with Perception provides a range of magnification from approximately 10× to 100,000×. The exact limits depend upon the working distance."
"‘Best’ is defined as the magnification that enables the optimal range of high quality images when using the Zoom Box."
Spot: "The crossover of the condenser lens is represented by a value of 100%, and a typical working range is between 10 and 35%."
"he distance between the pole piece of the objective lens and the convergence point is called the working distance, and is displayed below the focus slider"
"Short working distances (less than 10 mm) produce the best high-resolution images"
"For EDS work, working distances in the 13-20 mm range will produce the largest number of x-rays"
"The most common reason that the AutoFocus function fails to find a good focus is too little structure and contrast in the image."
"Preferences: Vacuum Threshold On systems with a vacuum gauge, the interlock is a function of both the turbo-pump speed and the vacuum threshold. Enter the minimum pressure required to enable high voltage in this edit box."
"Table 4.3. Proprietary TIFF tags for spectral data (registered by Aspex, LLC)."
Tag name Index Data type Content
Spectral data 33618 Word or DWord Array of x-ray event counts
X-resolution 33619 ASCII Energy units per channel
X-offset 33620 ASCII Zero offset for the energy axis
Y-resolution 33621 ASCII Vertical axis units
Y-offset 33622 ASCII Zero offset for the vertical axis
"A typical pulse processor takes ~50 μs to digitize each x-ray."
"Both detectors record 2,048 channels of 10eV per channel"
2018-06-30
Use T5 bit to remove cartridge
Yesterday ordered spare cartridge
