Difference between revisions of "Main Page"
| Line 1: | Line 1: | ||
This wiki collaboratively documents microscope techniques and other information. Its a spin off from [https://siliconpr0n.org/wiki/doku.php?id=microscope:start] where its primary focus was to help maintain semiconductor microscopes. | This wiki collaboratively documents microscope techniques and other information. Its a spin off from [https://siliconpr0n.org/wiki/doku.php?id=microscope:start] where its primary focus was to help maintain semiconductor microscopes. | ||
| + | |||
| + | = Main pages = | ||
| + | |||
| + | [SEM] | ||
| + | |||
| + | [TEM] | ||
| + | |||
| + | [Olympus] | ||
Revision as of 13:09, 26 December 2018
This wiki collaboratively documents microscope techniques and other information. Its a spin off from [1] where its primary focus was to help maintain semiconductor microscopes.
Contents
Main pages
[SEM]
[TEM]
[Olympus]
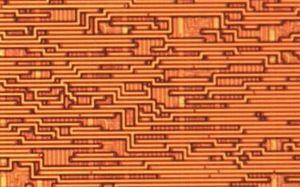
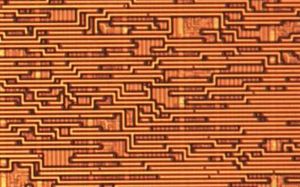
Field Stop (FS) and Aperature Stop (FS)
Properly adjusted can give a real improvement in image quality. Unadjusted (Mit20x objejective):
Adjusted (Mit20x objejective):
DIY non-optical
Type
Epi-illumination: the most common type used in IC RE. A typical setup has a side lamp that hits a half silvered mirror between the objective and the eyepiece. Light hits the mirror to reflect towards the sample and bounces back. Half of that light reaches the eyepieces and that is the image you observe. This can produce thin film interference patterns to distinguish even same color specimens.
Biological: the most common type of microscope most people encounter. A typical setup has a lamp in the base that shines light through a condenser that focuses light through a sample and into the objective and then into the eyepiece. Since most IC samples are opaque this type of microscope is not suitable for IC work. However, as a move of desperation, you can use one by shining light from the side. This is how I did my early IC work. Things are much better if you can get a hold of a fiber illuminator, but chances are if you can afford a fiber illuminator you can afford a cheap epi-illumination microscope.
Confocal]: can produce 3-D images. Desirable as an upgrade from an epi-illumination microscope but costs much more]
electron microscope (SEM)]: useful for high resolution images. High resolution than optical microscopes but not at atomic scale. Images have both large depth of field and resolution. Main local wiki article: sem_start SEM]
Transmission electron microscope (TEM)]: useful for very high resolution images at the atomic scale.]
Inverted: a microscope designed to look at a sample from below as opposed to above. There are both biological (for culture observation) and metallurgical versions. I find these inconvenient to use and don't recommend it.
Polarized light
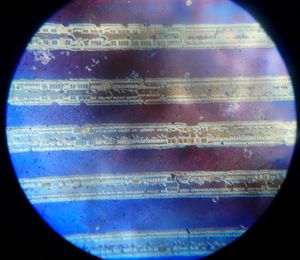
Polarized light can bring out a lot of interesting effects and help reduce glare. However, if you don't use strain free objectives you will get effects like this:


